Perfect Cheesy Pasta Bake, recipe #2

June 30, 2011

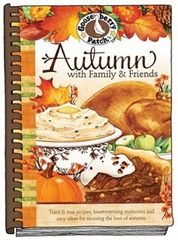
Welcome back for recipe #2 from In the Kitchen with the Real Farmwives of America & Friends and Gooseberry Patch!autumnfamilyfriends
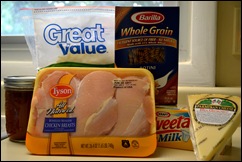
This is the first time I have cooked with chicken in a long time… We have freezer beef and freezer pork, so I don’t buy (or cook) much chicken. This time, I did! (And it was kind of a nice change.)ingredients
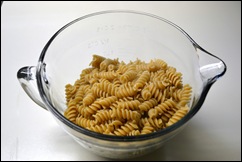
First, measure out 4 cups of uncooked pasta, and cook according to package directions. I used whole grain pasta, but no one says you have to. (The 13.5 ounce package I bought was the perfect 4 cup measurement.) Boil the pasta, drain, and put into a large bowl.cooked pasta
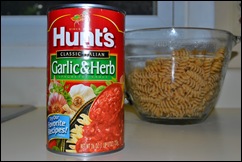
I had planned to use pasta sauce that we had canned last summer, but I only had pint jars left. This recipe calls for 3-1/2 cups, and a pint is only two cups, so I pulled this pinch-hitter out of my pantry at the last minute. Again, I just used the whole container. It was pretty close to 3-1/2 cups.pinch hitter
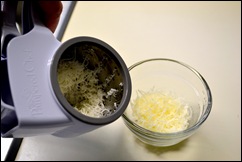
Then, grate up 1/2 cup of parmesan cheese. The pre-grated stuff is fine, too. I like to use any excuse to get out my fancy cheese grater!parmesan
Add the sauce (canned, jarred, or otherwise) and the parmesan to the cooked pasta.sauce and cheese
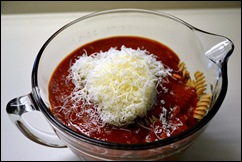
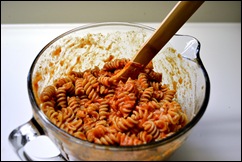
Mix it all up…mix it up

And put half the pasta in an 8×8 baking pan. Then put 1 cup of cooked, diced chicken on top of the pasta layer. (This is one chicken breast, boiled, and diced. It’s kind of a boring way to cook chicken, but the chicken is not the star in this dish – this is all about the pasta and the cheese!)layers
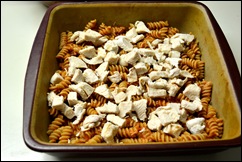
Layer the rest of the pasta on top of the chicken.

Grate up 1/2 cup Velveeta cheese (I prefer the 2% milk variety)…velveeta
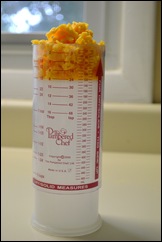
And get yourself 1/2 cup shredded mozzarella (this was pre-shredded).mozzarella
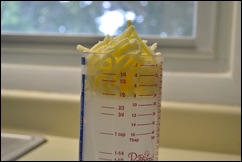
Spread the cheeses over the top of the pasta dish.cheese
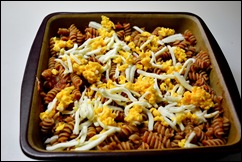
I didn’t think that looked like quite enough cheese. So I added extra mozzarella. Hubby Doc thinks I should have added even more.more cheese
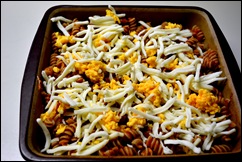
Bake at 350 degrees for 30-35 minutes, until hot and bubbly. (In my stoneware, it took 35 minutes. Another 5 and the cheese should have gotten that pretty brown color.)melty goodness
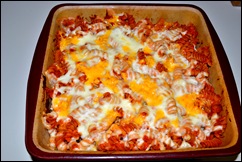
I served this to my girlfriends with Garlic Bubble Bread (recipe coming this weekend!) for our girls’ night in. The girls loved it. (Although the bread took center stage!)plus bread
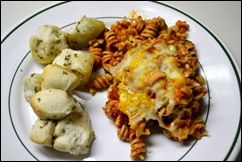
Don’t worry, we ate our vegetables too. We had a veggie platter to pick from all night long. Just none of them made it on the plate… Whoops.

While we did enjoy the pasta, I would recommend a few slight changes. We all thought there could have been a little more sauce – maybe a can of diced tomatoes for a bit more texture? And you can never go wrong with more cheese… I will definitely make this again, but I might tweak it, just a little…

Special thanks to Gooseberry Patch for providing me with this great cookbook to try and share with you. If you would like to purchase this or other cookbooks, please visit their store. If you would like to see other great recipes, check out www.realfarmwivesofamerica.com.

Update:  Here’s the printable recipe card!


Play ball!

June 29, 2011

Family Night

The winner of the Indianapolis Indians baseball tickets for Indiana’s Family of Farmers Family Night at the Ball Park is…

Donna Handley! (She commented on my Blogger site.)

Congratulations, and thanks for entering! I’ll be contacting you soon with the details. I hope you and the kids enjoy the night, and have a chance to talk with some Real Farmwives and their Kids!

Technorati Tags:

A bucket for every occasion

June 27, 2011

Okay, so it’s just one bucket. But it got quite a bit of use this week.

Red Hill General Store was very generous to supply the Real Farmwives of America & Friends with some buckets to try out! (Check out the rest of the girls today to see what they did with their buckets, too.)

I got a 4-quart galvanized bucket to play with. And let me say, it has already come in pretty handy, and I’ve got some more uses planned for it in the future!

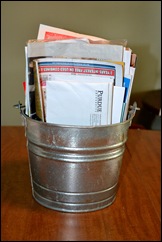
Right after I got my bucket, I went away to a veterinary conference for a week. I asked Hubby Doc to use the bucket to corral the mail while I was gone. It’s just the perfect size!mail call

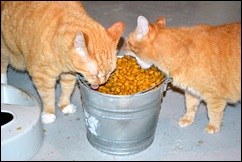
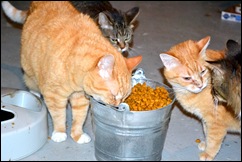
I thought perhaps I could use this bucket as a cat dish, and then I wouldn’t have to worry about feeding the cats twice a day (you know, self-feeding).

No such luck. Leo (on the left with the white toes) and Pretzel (on the right with the giant mouth) went to town on the huge bucket of food.dinner time

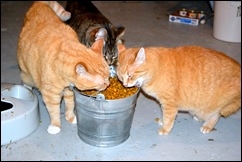
And they would not share with Martin…
no sharing

Or with Orleans. Poor Floof-Cat.i said no

Okay, so scrap that idea. I will share that I made a giant mess trying to get the cat food back into the original bag. Cat food all over the floor. Whoops. Good thing I had four hungry cats around to help me clean it up!

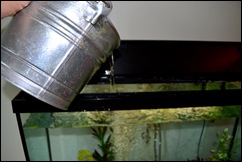
My fish tank was looking a little low, so I used the bucket to top off the tank (after a thorough washing and rinsing, of course). Just the perfect size for this, too!thirsty fish

I may have accidentally poured water all over the floor while I was filling the fish tank. Note to self, next time, get someone else to take photos when I am dealing with running water in the house…

So I took my bucket outside to see what kind of trouble I could get in out in the garden.

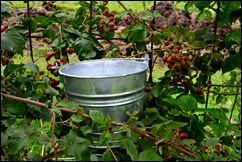
Hmmm… These blackberries are not quite ripe yet. But when they are, this bucket will be the perfect size to pick them into! (And then I’ll be able to post about our famous homemade blackberry ice cream recipe…  yum!)not quite ready

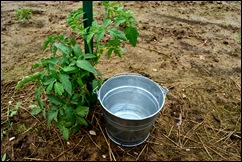
The tomato plants are also not quite ready. They have started to flower, but are far from putting on fruit. Hubby Doc likes to pick into a five-gallon bucket in the garden. Those get too heavy for me, so this 1-gallon bucket will be just right.tomatoes soon

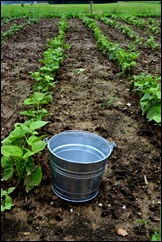
Um, did he really plant four rows of green beans? I might need another bucket…how many beans

On the way back inside, I stopped to pick a few lilies from my weedy flower beds.lilies for inside

And then I turned my bucket into a centerpiece for dinner with the girls before the True Blood season premiere!centerpiece for the girls

If only I can get the cats to leave the flowers alone… (That is a long shot around here.)

Like the bucket? The Real Farmwives of America & Friends are having a giveaway this week! Be sure to stop by and enter to win a Galvanized Embossed Tub from Red Hill General Store on the Real Farmwives’ blog. Also check out Red Hill General Store – they have lots of buckets, tubs, bottles, and so much more!!

Thanks, Red Hill, this bucket fits right in around my Home & Garden!

While Red Hill General Store did provide me with a bucket to blog about for this post the pictures, ideas and opinions shared here are my own.

Technorati Tags: ,


Dirty jobs: Breeding cows

June 24, 2011
Technorati Tags: ,

Welcome to a joint Real Farmwives of America & Friends post!RFOAbadge The theme for this post is…

Dirty Jobs.

There is no shortage of dirty jobs on the farm.

Every spring, we breed our certified Angus cows to bulls that we select for their genetic potential. We are looking for things like a relatively low birth weight with a relatively high weaning weight (born small so they are easy for the cow to give birth to, but they grow quickly), rate of gain (growth), and meat quality. There is great data on these (and more) characteristics on many registered bulls. We have the luxury of being able to choose the bulls that we breed our cows to, and we can select different bulls for different cows.

How?

We artificially inseminate our cows every year.

Some of this is going to sound a little odd. But, believe it or not, this is pretty similar to what women go through with hormone therapy and in vitro fertilization when they are having trouble getting pregnant. Read on, and keep an open mind!

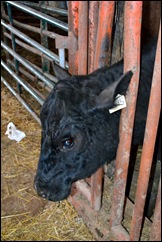
First, we bring the cows into the barn and run them, one at a time, in the head gate.head gate

Before we can breed them, we need to synchronize their heat cycles so they are all ready to get pregnant at the same time. Otherwise, we would need to spend a lot of time watching each individual cow to see when she was most likely to get pregnant. This way, we can work with all the cows at once, and not have to stress them out by handling them too many times.

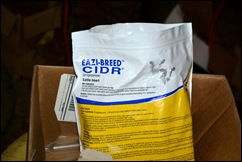
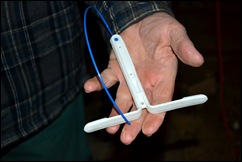
These are called CIDRs (Controlled Intrauterine Drug Release). They contain a synthetic progesterone. This is what we use to synchronize the heat cycles in our cows. You know how women living together will synchronize their periods? We’re doing this for them. CIDR bag

Look familiar? Have you seen the commercials for Mirena on TV? Those are a much smaller version than this. The hormone is even similar, but it is slightly different. Mirena are intrauterine birth control devices for women. CIDRs for cattle (stays in the vagina) and Mirena for women (stays in the uterus) accomplish essentially the same thing – they slowly release hormones, and keep the ovaries from cycling.CIDR

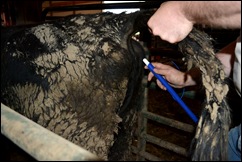
We insert the CIDR into each cow’s uterus with an applicator.insert CIDR

And 7 days later, we take the CIDRs back out (that’s what the blue string is for). With the CIDR out, the cow’s progesterone level falls, and she starts to cycle again. We have a pretty short window here, and we need to make sure we plan ahead. 60-66 hours after the CIDRs are removed, every cow should be ready to ovulate. This is when we breed them to have the highest chance of conceiving.

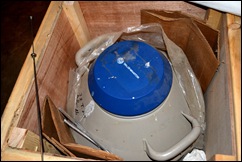
We get catalogs with pictures and statistics of the bulls. Before we start this whole process, we look through the catalog and choose the bulls we want to breed our cows to. We order the semen, and it is delivered to us, frozen, in a tank full of liquid nitrogen.LN2 tank 1

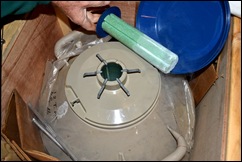
The liquid nitrogen tank has a Styrofoam insulator, and there are 5 different mini-canisters down inside the tank. This tank can actually hold 6 – the silver sticks poking out of the opening are the handles to each of the mini-canisters. Each mini-canister can hold up to 12 samples of semen. The semen is stored in small tubes, called straws.LN2 tank 2

We take out one straw at a time, and place it in this heated water bath. It is important to warm the semen up at just the right rate – if you warm it up too slowly or too quickly, the sperm will die and the cows won’t get pregnant. If it gets too warm or not warm enough, the sperm won’t be as active as they should be, and the cow’s won’t get pregnant. It’s a bit tricky.water bath

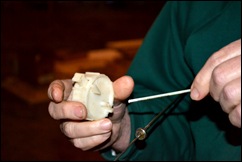
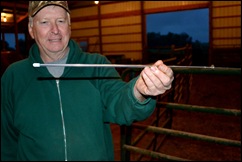
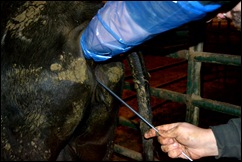
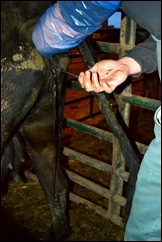
After the semen is thawed, we cut the end off the straw.cut strawThe straw is loaded into the artificial insemination pipette. (That’s my father-in-law. He’s a veterinarian, too.)insemination pipette  Then, using the pipette, the semen is put into the cow’s uterus.inseminateCan you see the shiny stuff hanging down from the back end of this cow? This is mucus from her vagina. Kind of gross, I know, but this is a good sign for us. When cows are in heat, and ready to get pregnant, they produce a lot of stretchy mucus. We’d like to see this stretching all the way down to the ground. Then we know she’s really ready to conceive.in heatThree weeks after the artificial insemination, we turn a bull out in the pasture with the cows. We call him the “clean up” bull. His only job is to get any cows who aren’t pregnant yet, pregnant. He has a pretty cushy life – eat, sleep, and, well, play.

Around 45 days after the artificial insemination date, we will check to see if the cows are pregnant. This is done by a rectal examination – we palpate the cows uterus and can tell by the amount of fluid and any “lumps and bumps” (little bitty babies) in the uterus if the cow is pregnant or not. Forth-five days is one of the earliest times that a veterinarian can tell if a cow is pregnant or not; before then there is not much difference in the feel of the uterus. Vets who have been doing this for years can get quite good, and can often tell earlier.

When the cow is confirmed pregnant, we are done, and all she has to do is eat and grow a baby. If she is not pregnant, we will check her again 45 days after the bull leaves. Hopefully, the bull will “clean up” the rest of the herd.

Dirty job? Yes. Absolutely. But we sure do love the calves we get nine months later!

Don’t forget to check out the other Dirty Jobs posts from the Real Farmwives of America & Friends today!


Piece of custard!

June 23, 2011
I’m so happy to be posting my first Gooseberry Patch recipe!


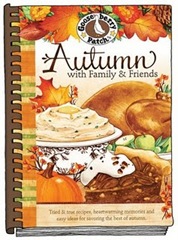
As the readers at Real Farmwives of America & Friends voted on, I will be cooking from Autumn with Family and Friends for the next three months. autumnfamilyfriendsSo, let’s jump right in!! I started with the Pumpkin Custard Crunch recipe.

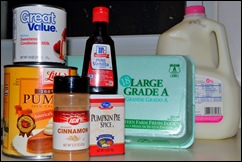
First, gather your ingredients for the custard part:custard ingredients

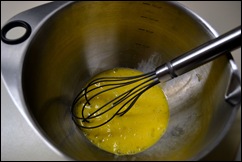
Beat three eggs…eggs

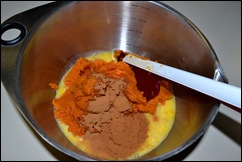
And add one 29 ounce can of pumpkin (that’s the big ones), 2 teaspoons of pumpkin pie spice, and 1 teaspoon of cinnamon. (I went heavy on the pie spice. I’m a spice girl. But not like the scary lip-synching ones from the 90s.)pumpkin

I would recommend mixing the pumpkin and spices together first, then adding the eggs. It takes a little extra “oomph” to get the eggs to combine evenly with the pumpkin, and I think adding the spices first might help.

Add one cup of milk… (I used skim)milk

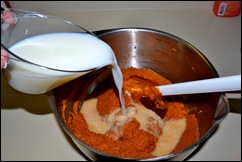
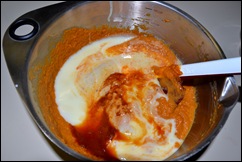
one can of sweetened condensed milk, and 1 teaspoon of vanilla. (I used the non-fat sweetened condensed milk. I’m going to be using a cup of butter later – I’m trying to cut back on the calories where I can!)vanilla

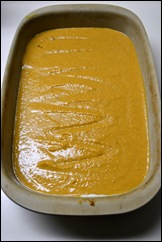
Mix it up to a beautiful pumpkin pie-like consistency, and pour it into a greased 9×13 baking pan.custard

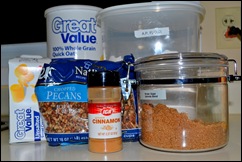
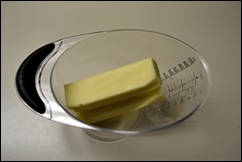
Then gather your ingredients for the crunch topping:crunch ingredients

Melt one cup (two sticks) of butter. This took about 90 seconds in the microwave.melt butter

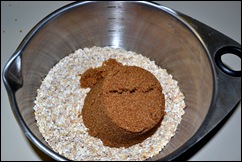
Mix 3 cups of quick-cooking oats, 1 cup of packed brown sugar… (I used the Splenda brown sugar blend. If you try that, you should cut the amount of brown sugar by half. I forgot to do that. Whoops.)oats

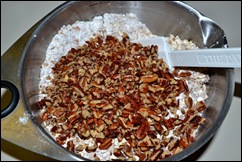
Add 1 cup of all-purpose flour, 1 cup of crushed walnuts or pecans, and 1 teaspoon of cinnamon. (Again, I went a bit heavy on the cinnamon.)pecans

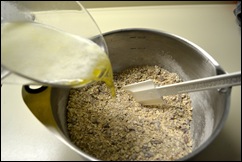
Mix it all up, and add the melted butter. Toss that mixture until it is a buttery, crumby, yummy mess. add butter

(I had to switch to a bigger bowl for this part. I thought my 8-cup bowl would be plenty, but… 3 cups oats + 1 cup brown sugar + 1 cup flour + 1 cup pecans = 6 cups. Plus butter. Plus room for mixing. Note to self – always use a bigger bowl!)

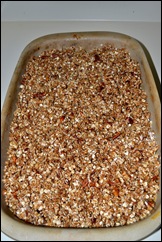
Spoon the crunch topping over the custard. Don’t be shy. You have over 6 cups of topping! Be generous, and layer heavily. Seriously. There’s about an inch of “topping” here.before baking

Bake it at 350 degrees for 45-60 minutes, until a knife comes out clean. In my stoneware pan, it took 55 minutes to bake.

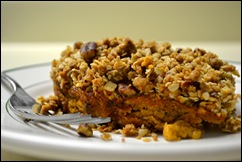
Serve warm, and enjoy!!piece of custard

This would be great served with vanilla ice cream (I didn’t have any), or whipped cream (didn’t have any of that, either).

This is also fantastic cold for breakfast the next morning. Hypothetically. Or not so hypothetically.

Mine came out a bit too sweet, but that is all my fault for adding extra brown sugar. Although I do like the brown sugar flavor. I think this would be even a notch better with 1/2 teaspoon nutmeg added to the custard… That’s for next time!

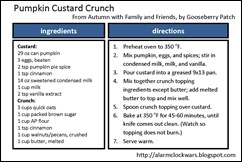
The printable recipe card:pumpkin_custard_crunch_card


Photobucket


Special thanks to Gooseberry Patch for providing me with this great cookbook to try and share with you. If you would like to purchase this or other cookbooks, please visit their store. If you would like to see other great recipes, check out www.realfarmwivesofamerica.com.

Technorati Tags: ,,,

Are you ready for some… baseball?

June 21, 2011
Technorati Tags:
Right, okay, that’s the football promo. I will admit, I am not a huge baseball fan. I’m actually a hockey girl, and baseball just doesn’t move fast enough for me. But this is a great excuse to get together and hang out with some family and friends!

 
My friends at Indiana’s Family of Farmers are hosting Family Night at the Ballpark on Tuesday, July 19th at the Indianapolis Indians baseball game, and they are working with some Indiana bloggers to help give away tickets!!
 
Winners will receive up to 8 tickets to the game for their family and friends to come hang out with IFOF at the Indians game on July 19th (game starts at 7:00pm). The winners will also get a wristband to join IFOF in the picnic area for an invite-only picnic with a choice of hot dog, hamburger, or pulled chicken barbecue. There will also be a selection of salads, cookies, and drinks.
 
Wait – it gets better!
 
Some of the Real Farmwives of America and Friends will be there, too!
 
(Sorry to say that I can not make it, but some of the other RFOA will be there for sure!!)
 
So…  to enter! You must…
1. Subscribe to AlarmClockWars through WordPress (top information bar for WP users) or through email (on the right sidebar)
 
You can also…
2. Fan Alarm Clock Wars on Facebook
3. Follow @AlarmClockWars on Twitter
5. Fan Indiana’s Family of Farmers on Facebook
6. Follow @FamilyofFarmers on Twitter
7. Follow the Real Farmwives of America blog through GFC
8. Fan the Real Farmwives of America and Friends on Facebook
9. Follow @realfarmwives on Twitter
10. Tweet about this contest and mention @AlarmClockWars and @FamilyofFarmers in your tweet
 
Leave me a separate comment for each entry.
 
The contest ends at midnight (central time) on June 28th. I will announce the winner here on June 29th.
 
Good luck!!
 
(Indiana’s Family of Farmers provided me with tickets for this giveaway.)

Not as good as homemade

June 7, 2011

But, what is?

Cheesecake Factory cheesecake comes to mind… And Dairy Queen ice cream cakes, but who makes those at home anyway? (No, really, tell me who – I want to know how!) Stouffer’s frozen mac & cheese is pretty darn good…

But that’s not the point!

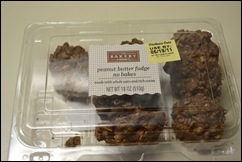
The point is that these are definitely NOT as good as homemade.no bake box

My friend Justin used to make no-bake cookies for me and Dani in college. They were addictive. Seriously.

I saw these at Walmart yesterday, and in a rare moment of weakness, I bought a box.

Wait, does that label say use by 6/19?no bake label

Justin’s cookies would never last for 13 days.

Never.

These look the same…

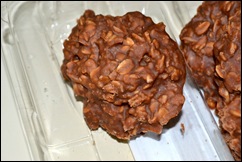
Pretty chocolatey color, lots of rolled oats, yummy peanut butter smell…close up

But they are not the same. Nowhere near as good. A little dry, and not as much peanut buttery goodness as I want.

Don’t get me wrong. I’ll eat them.

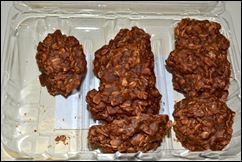
I ate four before I managed to take pictures.cookies

But I’ll complain the whole time.

Justin – I need your recipe! (Do they come in calorie-free?)


Grilled ham steak

June 6, 2011

About two weeks ago, I was featured on The Real Farmwives of America and Friends blog for the In the Kitchen feature we are doing with Gooseberry Patch.

In my interview, I talked a lot about my grill. Gooseberry Patch even went so far to tweet that I am a grilling superstar! (Wow! Thanks!)

Then I realized I have never actually blogged about my grill. I use it. Lots. All year round. But I have somehow managed to overlook actually talking about it.

One of the problems this time of year is that by the time Hubby Doc comes in from work/garden/hay/barn projects, it’s dark outside. And grilling pictures don’t go so well in the dark.

But last night I made him take a break, and we I cooked early. Really. It was around 6:30!

I had grabbed a ham steak out of our magic freezer earlier in the day, so I was ready to go!

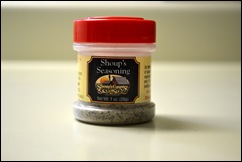
I am pretty simple when it comes to grilling. A bit of olive oil and some spices to rub into the meat, and I’m set. A favorite spice for pork around here is Shoup’s Seasoning.shoup

I was introduced to Shoup’s by Ott, A (and thank you so much!) and have never gone back. I give the meat a drizzle of olive oil, a healthy sprinkle of the seasoning, and give it a good rub.

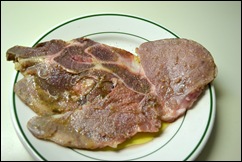
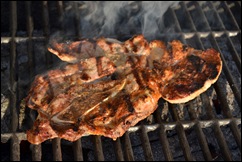
Now, this is not your typical grocery store ham steak. This particular piece of ham comes from a pig that Hubby Doc and I actually helped to butcher. This meat is not preseasoned, and it is not precooked. It doesn’t look like a ham steak you would find at the grocery store, and it’s not supposed to at this point. This looks more like a pork chop, but tastes like ham… yum!rubbed ham

I get the grill good and hot, and put the ham steak on high for a few minutes. I flip it over when the first side looks about like this… (very scientific, I know)grilled ham

The second side never takes as long to cook – the trick is paying close attention so it doesn’t burn! One of the problems with meat that we prepared ourselves is that it is not always very evenly sliced. Sometimes I’ll end up with a thinner part that is a little, shall we say… flame-broiled… while the thicker part of the meat is just perfect. Whoops.

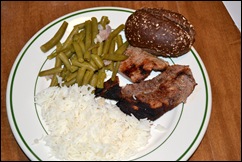
But, served up with our canned green beans (cooked with bacon), long grain rice, and a multi-grain roll, where can you go wrong?

ham for dinner

Happy Hunk of Meat Monday!